🔗 Affiliate Disclosure: As an Amazon Associate, Tech Rig Review earns from qualifying purchases. Links on this page may be affiliate links — at no extra cost to you.
Learn how to get your monitor to the right height with a simple measurement method, plus real Amazon products — risers, stands, and arms — for every budget and setup.
If you find yourself tilting your chin down to read your screen, or you notice your neck feels stiff by the end of the day, there’s a good chance your monitor is sitting too low. Getting your monitor to the right height is one of the simplest, cheapest fixes in all of home office ergonomics — and one of the most commonly overlooked.
Most monitors ship on a short fixed stand designed to look good in a product photo, not to match your actual eye level. Combine that with a desk that’s the wrong height for your chair, and it’s easy to end up looking down at your screen for eight hours a day without ever noticing it’s the root of your discomfort.
This guide walks through exactly how to figure out the right height for your specific setup, how to measure it in under a minute, and which real, currently-available products can get you there — whether you need a five-dollar stack of books as a temporary fix or a fully adjustable monitor arm as a permanent one.
Table of Contents
Why Monitor Height Actually Matters
The core idea is simple: your neck is designed to sit in a neutral, forward-facing position, not tilted down or craned up for extended periods. When your monitor sits too low, you unconsciously drop your chin to see it. Held for hours at a time, that position puts sustained load on the muscles and discs at the back of your neck — often described as “tech neck” — and it’s a common contributor to neck stiffness, tension headaches, and upper back pain among people who work at a screen all day.
A monitor that’s too high causes a different but related problem: you tilt your head backward, which strains the front of your neck and can make your eyes feel more fatigued from the wider range of upward eye movement needed to read the screen.
The goal isn’t a single fixed number of inches — it’s a relationship between your eyes, your screen, and your chair. Get that relationship right, and the correct height follows naturally.
How to Find the Right Height for Your Monitor
Here’s a simple way to check your current setup, without needing any tools.
Step 1: Sit in your normal working posture. Don’t artificially straighten up for the test — sit the way you actually sit during a normal workday, since that’s the position you need to optimize for.
Step 2: Look straight ahead, not up or down. Keep your neck relaxed and your gaze level, the same way you’d look at someone standing in front of you at a conversational distance.
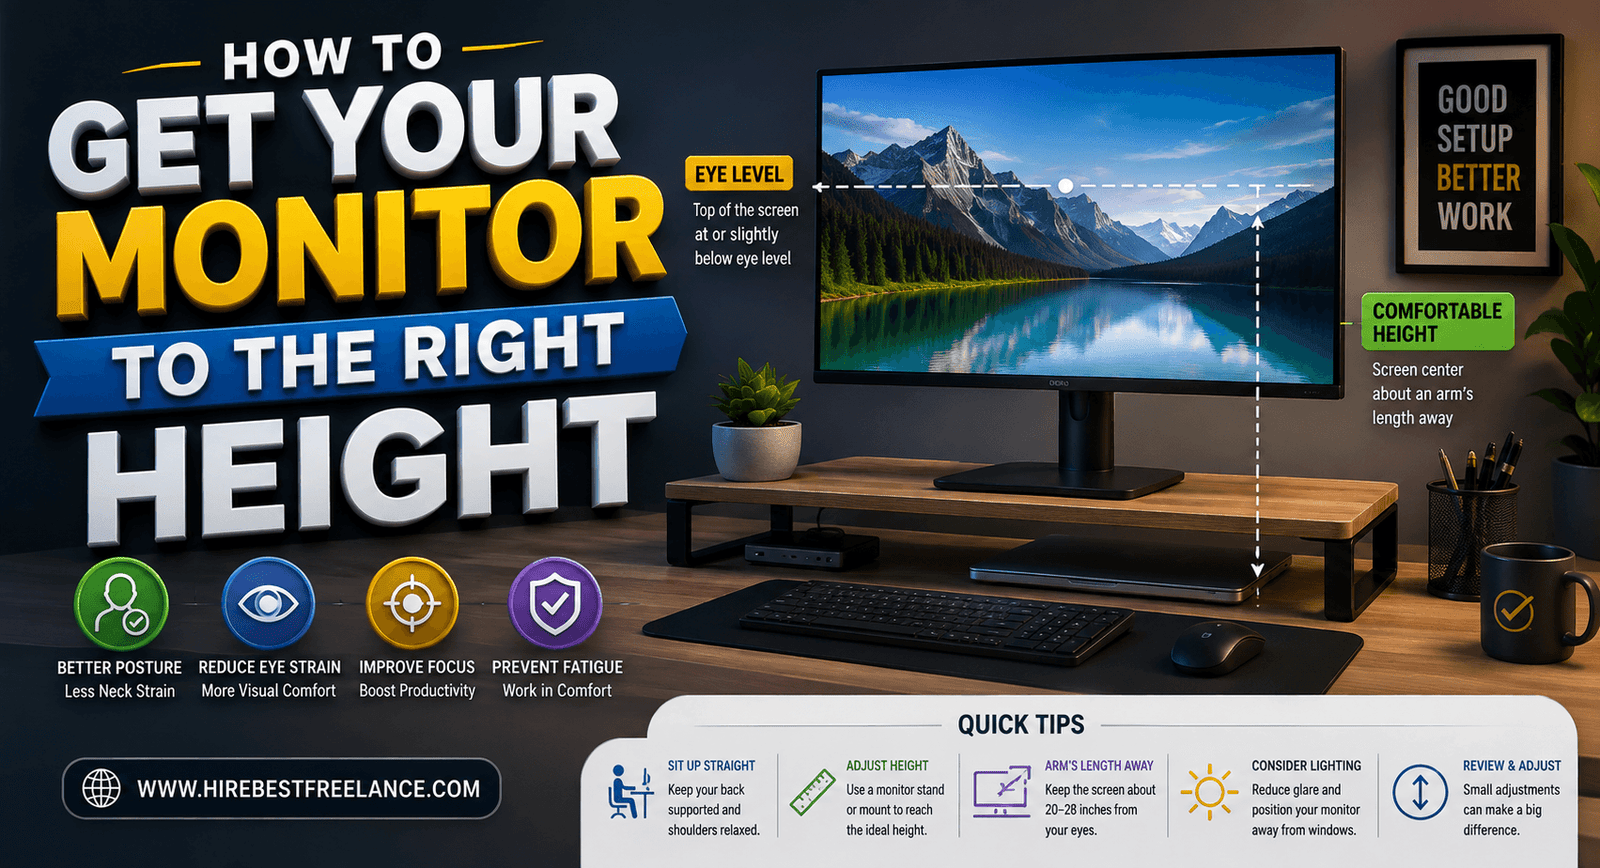
Step 3: Check where the top of your screen lands. The top of your monitor should sit at or just slightly below your eye level when you’re looking straight ahead. Your eyes should naturally fall on the upper third of the screen without tilting your head.
Step 4: Check your viewing distance. Your screen should generally sit about an arm’s length away — roughly 20 to 28 inches from your eyes. If you’re leaning forward to read text, the monitor is too far away or the text is too small; if you’re leaning back, it may be too close.
Step 5: Check the tilt. The screen should tilt back slightly, generally 10 to 20 degrees, so you’re looking down into the screen slightly rather than straight into a perfectly vertical panel. This small detail helps reduce glare and keeps your neck in a more relaxed position.
If your monitor fails the first check — the top of the screen sits noticeably below your eye level even after adjusting your chair — that’s the clearest sign you need to raise it, and that’s where the solutions below come in.
Fix Your Chair Height First
Before buying anything, check whether your chair, not your monitor, is actually the problem. If your chair sits too low, your eye level drops with it, and no monitor stand can fully compensate for that mismatch. Your feet should sit flat on the floor (or on a footrest) with your knees at roughly a 90-degree angle, and your elbows should also sit at about 90 degrees when your hands are on the keyboard.
If adjusting your chair to the right height throws off your desk or keyboard position, that’s a sign your whole workstation setup needs a look, not just the monitor. Our guide to the best Amazon standing desks covers how a height-adjustable desk can solve that chair-versus-desk mismatch entirely, since it lets you move the whole work surface instead of compensating with the chair alone.
Once your chair and desk height feel right, it’s time to bring the monitor itself up to meet your eye level.
Option 1: A Simple, Budget Monitor Riser
If your monitor just needs a few inches of lift and you don’t need much adjustability beyond that, a basic stackable riser is the cheapest and easiest fix.
The Amazon Basics Height Adjustable Monitor Stand Riser uses a 3-level stackable design, so you can add or remove sections to fine-tune the height rather than being locked into one fixed position. It supports up to 22 pounds, which comfortably covers the vast majority of monitors and even small laptops, and it includes a storage compartment underneath for a keyboard, cables, or other desk items — useful if your desk is on the smaller side.
This kind of riser works well when your monitor is only a couple of inches too low and doesn’t already have a VESA mount you want to use. It’s a solid, no-fuss starting point if you’re not sure yet how much height adjustment you’ll actually need.
Option 2: A Vented Riser for Laptops or Warm-Running Monitors
If you’re placing a laptop or an older monitor that tends to run warm on your riser, airflow becomes a genuine consideration, not just a marketing detail.
The HUANUO Monitor Riser with Airflow Vents is built from powder-coated steel with a ventilated platform, specifically designed to help dissipate heat from whatever sits on top of it. It supports up to 44 pounds — well beyond typical monitor weight — and fits laptops up to 15.6 inches if you’re using it for a laptop screen rather than an external monitor. Tool-free assembly means you can have it set up in a couple of minutes.
This is a reasonable middle-ground option if you want a stable, no-adjustment-needed riser with a bit more weight capacity and ventilation than the most basic stackable designs.
Option 3: An Adjustable Freestanding Monitor Stand
If a fixed riser doesn’t give you enough range, and your monitor has a VESA mounting pattern on the back (a set of four small threaded holes, usually 75x75mm or 100x100mm, standardized by the Video Electronics Standards Association), a freestanding adjustable stand gives you a lot more control over the exact height, tilt, and swivel angle.
The Amazon Basics LCD Computer Monitor Free-Standing Desk Stand Riser mounts directly to your monitor’s VESA pattern and lets you adjust height, tilt, swivel, and rotate a full 360 degrees, rather than being limited to whatever height a stackable riser section gives you. Because it attaches directly to the monitor rather than sitting underneath it, it also tends to save desk space compared to a box-style riser.
You can confirm whether your monitor supports VESA mounting by checking the specifications on the manufacturer’s page, or by looking for four small screw holes on the back of the panel — most monitors sold in the last decade support one of the two standard VESA patterns.
Option 4: A Full Monitor Arm for Maximum Flexibility
If you want your monitor to move freely — up, down, forward, back, tilted, rotated into portrait mode — without touching a separate stand at all, a gas-spring monitor arm is the most capable option on this list, and it frees up your entire desk surface at the same time.
The HUANUO Single Monitor Arm uses a gas-spring mechanism to support monitors from 13 to 32 inches, holding up to 19.8 pounds, and it installs with either a C-clamp or a grommet mount depending on your desk. Once mounted, repositioning the monitor takes seconds — a real advantage if you switch between sitting and standing throughout the day, or if multiple people share the same desk and need different heights.
This is the option worth considering if you’ve already tried a riser and found it doesn’t give you enough range, or if desk space is tight enough that clearing the monitor’s footprint entirely would make a real difference.
Option 5: A Laptop Stand, If Your Laptop Is Your Only Screen
Everything above assumes an external monitor, but if you’re working entirely from a laptop screen, the same height principle still applies — a laptop sitting flat on the desk puts your eyes looking down at roughly the same problematic angle as a monitor that’s too low.
The Lamicall Adjustable Aluminum Laptop Stand raises your laptop screen through a range of height and angle settings, fitting laptops from 10 to 17 inches. The obvious tradeoff is that raising the screen also raises the built-in keyboard out of a comfortable typing position, so this option works best paired with an external keyboard and mouse — otherwise you’re solving the neck problem by creating a wrist and shoulder one instead.
How to Choose Between These Options
With five solid paths above, here’s a simple way to narrow it down:
If your monitor is only slightly too low, a basic stackable riser like the Amazon Basics option is the fastest and cheapest fix — you don’t need a more complex solution for a small height gap.
If you’re placing a laptop or a warm-running display on the riser, prioritize one with ventilation, like the HUANUO vented riser, so heat doesn’t build up underneath.
If your monitor supports VESA mounting and you want finer control over height, tilt, and swivel without a bulky riser underneath it, the freestanding VESA stand is the better fit.
If you switch between sitting and standing, share your desk, or want your desk surface completely clear, a full gas-spring monitor arm is worth the extra setup effort — it’s the only option here that lets you reposition the screen in seconds rather than lifting and restacking.
If you’re working entirely from a laptop, a laptop stand solves the same height problem, but pair it with an external keyboard and mouse so you’re not trading neck strain for wrist strain.
For more background on the VESA mounting standard referenced above, the Video Electronics Standards Association publishes the official specifications manufacturers follow. If you want a deeper, government-backed reference on full workstation setup — chair, desk, and monitor together — OSHA’s Computer Workstations eTool covers recommended positioning in detail, and the CDC’s NIOSH ergonomics program covers the broader research behind these recommendations.
If you’d rather browse a fuller range of monitor stands side by side, our dedicated roundup of the best Amazon monitor stands compares more options across budgets, including dual-monitor and storage-focused picks not covered in this guide.
Frequently Asked Questions
How high should my monitor be above my desk?
There’s no single universal number, since it depends on your chair height, your torso length, and your desk height. The reliable method is functional, not numerical: sit in your normal posture, look straight ahead, and the top of your screen should land at or just slightly below your eye level.
Should the top or the center of my monitor be at eye level?
The top of the screen, not the center, should sit at or slightly below eye level. This naturally puts the center of the screen — where most of your reading and working actually happens — a bit lower, in a comfortable downward glance rather than requiring you to look straight ahead constantly.
Is it bad to look slightly down at a monitor?
A small downward angle, roughly 15 to 20 degrees from straight ahead, is actually considered ideal by most ergonomics guidance, since it keeps your neck relaxed rather than fully extended. The problem arises when the angle becomes much steeper, forcing you to tilt your whole head down rather than just your eyes.
Can I just stack books under my monitor instead of buying a stand?
Temporarily, yes — it’s a reasonable stopgap while you figure out exactly how much height you need. Books lack the stability, ventilation, and fine height adjustment of a purpose-built riser or stand, so it’s worth switching to a proper product once you’ve confirmed roughly how many inches of lift actually fixes your posture.
What is a VESA mount, and how do I know if my monitor has one?
VESA is a standardized pattern of four screw holes on the back of most monitors, used to attach the monitor to stands, arms, and wall mounts. You can check by looking at your monitor’s specification sheet for “VESA compatible” or a pattern size like 100x100mm, or by looking at the back of the panel for a small recessed square with four threaded holes.
Do laptop screens need the same height treatment as external monitors?
Yes — the same eye-level principle applies to a laptop screen. The difference is that raising a laptop also raises its built-in keyboard, so a laptop stand works best paired with a separate external keyboard and mouse to avoid trading a neck problem for a wrist and shoulder one.
Will a monitor arm work with any desk?
Most monitor arms attach with either a desk clamp or a grommet mount (through a pre-drilled hole in the desk), and either method typically supports desks up to a few inches thick. Always check the specific weight and desk-thickness range listed for your monitor and desk before buying, since very thick desks or unusually heavy monitors can fall outside some arms’ supported range.
Is a monitor arm worth it over a simple riser?
It depends on how often you need to reposition your screen. If you set your monitor’s height once and rarely touch it again, a riser is simpler and cheaper. If you switch between sitting and standing, share a desk with someone else, or want the flexibility to rotate into portrait mode, the added cost of a monitor arm buys real, ongoing convenience.
Final Thoughts
Getting your monitor to the right height comes down to one simple check: sit normally, look straight ahead, and see where your eyes naturally land on the screen. If that spot is well below the top third of your monitor, you have your answer.
From there, the right product depends mostly on how much adjustment you actually need. A basic riser solves a small height gap cheaply. A VESA stand or full monitor arm makes sense if you want finer control or plan to reposition your screen regularly. And if you’re working entirely from a laptop, a stand paired with an external keyboard gets you the same benefit without sacrificing wrist comfort.
It’s a small, inexpensive change, but for something you look at for eight hours a day, it’s one of the highest-value adjustments you can make to your whole workday.
As an Amazon Associate I earn from qualifying purchases.

MD.HASAN is an experienced SEO expert and amazon products review writer passionate about helping people find right products on amzon for buy without confusion. With 4 years of hands-on experience in content strategy and search engine optimization, he specializes in writing SEO-friendly blog posts that rank, engage, and convert.